
Getting Started with Kochava Tracking / SDK
In a hurry?Hire our experts for Assisted Guidance on Kochava Tracking Integration
About Kochava Tracking / SDK
If you integrated the kochava tracking SDK into your app, you can use kochava as tracking solution. This allows you to rely on kochavas reporting and their anti-fraud measures. Additionally, you can create and run CPA campaigns in this setup. Please login to kochava, set up tracking for your app and obtain the correct Redirect/Tracking URL to insert. Please make sure to enable postbacks for CPI Droid in your Kochava dashboard before starting the campaign.**Tip:**Try Free App Analytics by Kochava for FREE attribution.**Overview:**1. Integrate Kochava SDK:
- Initialize SDK & Test Integration:
- Activate Tracking Link for CPIDroid:
- Enable Install/Event Postbacks:
- Grab your Tracking Link:
1. Integrate Kochava SDK:
- Android SDK: https://support.kochava.com/sdk-integration/android-sdk-integration/
- iOS SDK: https://support.kochava.com/sdk-integration/ios-sdk-integration/
- Windows SDK: https://support.kochava.com/sdk-integration/windows-sdk-integration/**NOTICE:**For any technical support, please drop mail at support@kochava.com
2. Initialize SDK & Test Integration:
Testing an Integration with Kochava => https://support.kochava.com/sdk-integration/testing-the-integration-with-kochava/
- Testing Android SDK : https://support.kochava.com/sdk-integration/android-sdk-integration/ (scroll and find "Confirm the Integration" section)
- Testing iOS SDK : https://support.kochava.com/sdk-integration/ios-sdk-integration/ (scroll and find "Confirm the Integration" section)
- Testing Windows SDK : https://support.kochava.com/sdk-integration/windows-sdk-integration/ (scroll and find "Confirm the Integration" section)
*It is highly recommended that you initialize the SDK and test the integration beforehand.**NOTICE:**For any technical support, please drop mail at support@kochava.com
3. Activate Tracking Link for CPIDroid:
Please refer following useful articles from Kochava help center:-
- In Kochava, Select the desired Account and App. Go to**Links > Campaign Manager
- Find and clickAdd a Trackeroption, enterCampaign/Segment/Tracker**details. Select "CPIDroid" as your Media partner.
- Finally create tracking URLs as per this official guide => Create an Install Campaign
- **For iOS Only:**Please implement ATT prompt & keep Aggregated Advanced Privacy disabled for tracking to work properly (IMPORTANT) - Learn more
4. Enable Install/Event Postbacks:
- Enable Install Postback: Create a Kochava-Certified Postback
- Enable In-App Event Postback: https://support.kochava.com/campaign-management/post-install-event-creation-and-configuration/ (required for CPA campaign)
5. Grab your Tracking Link:
- Copy your Kochava tracking link (Click URL) from theACQUISITIONtab.
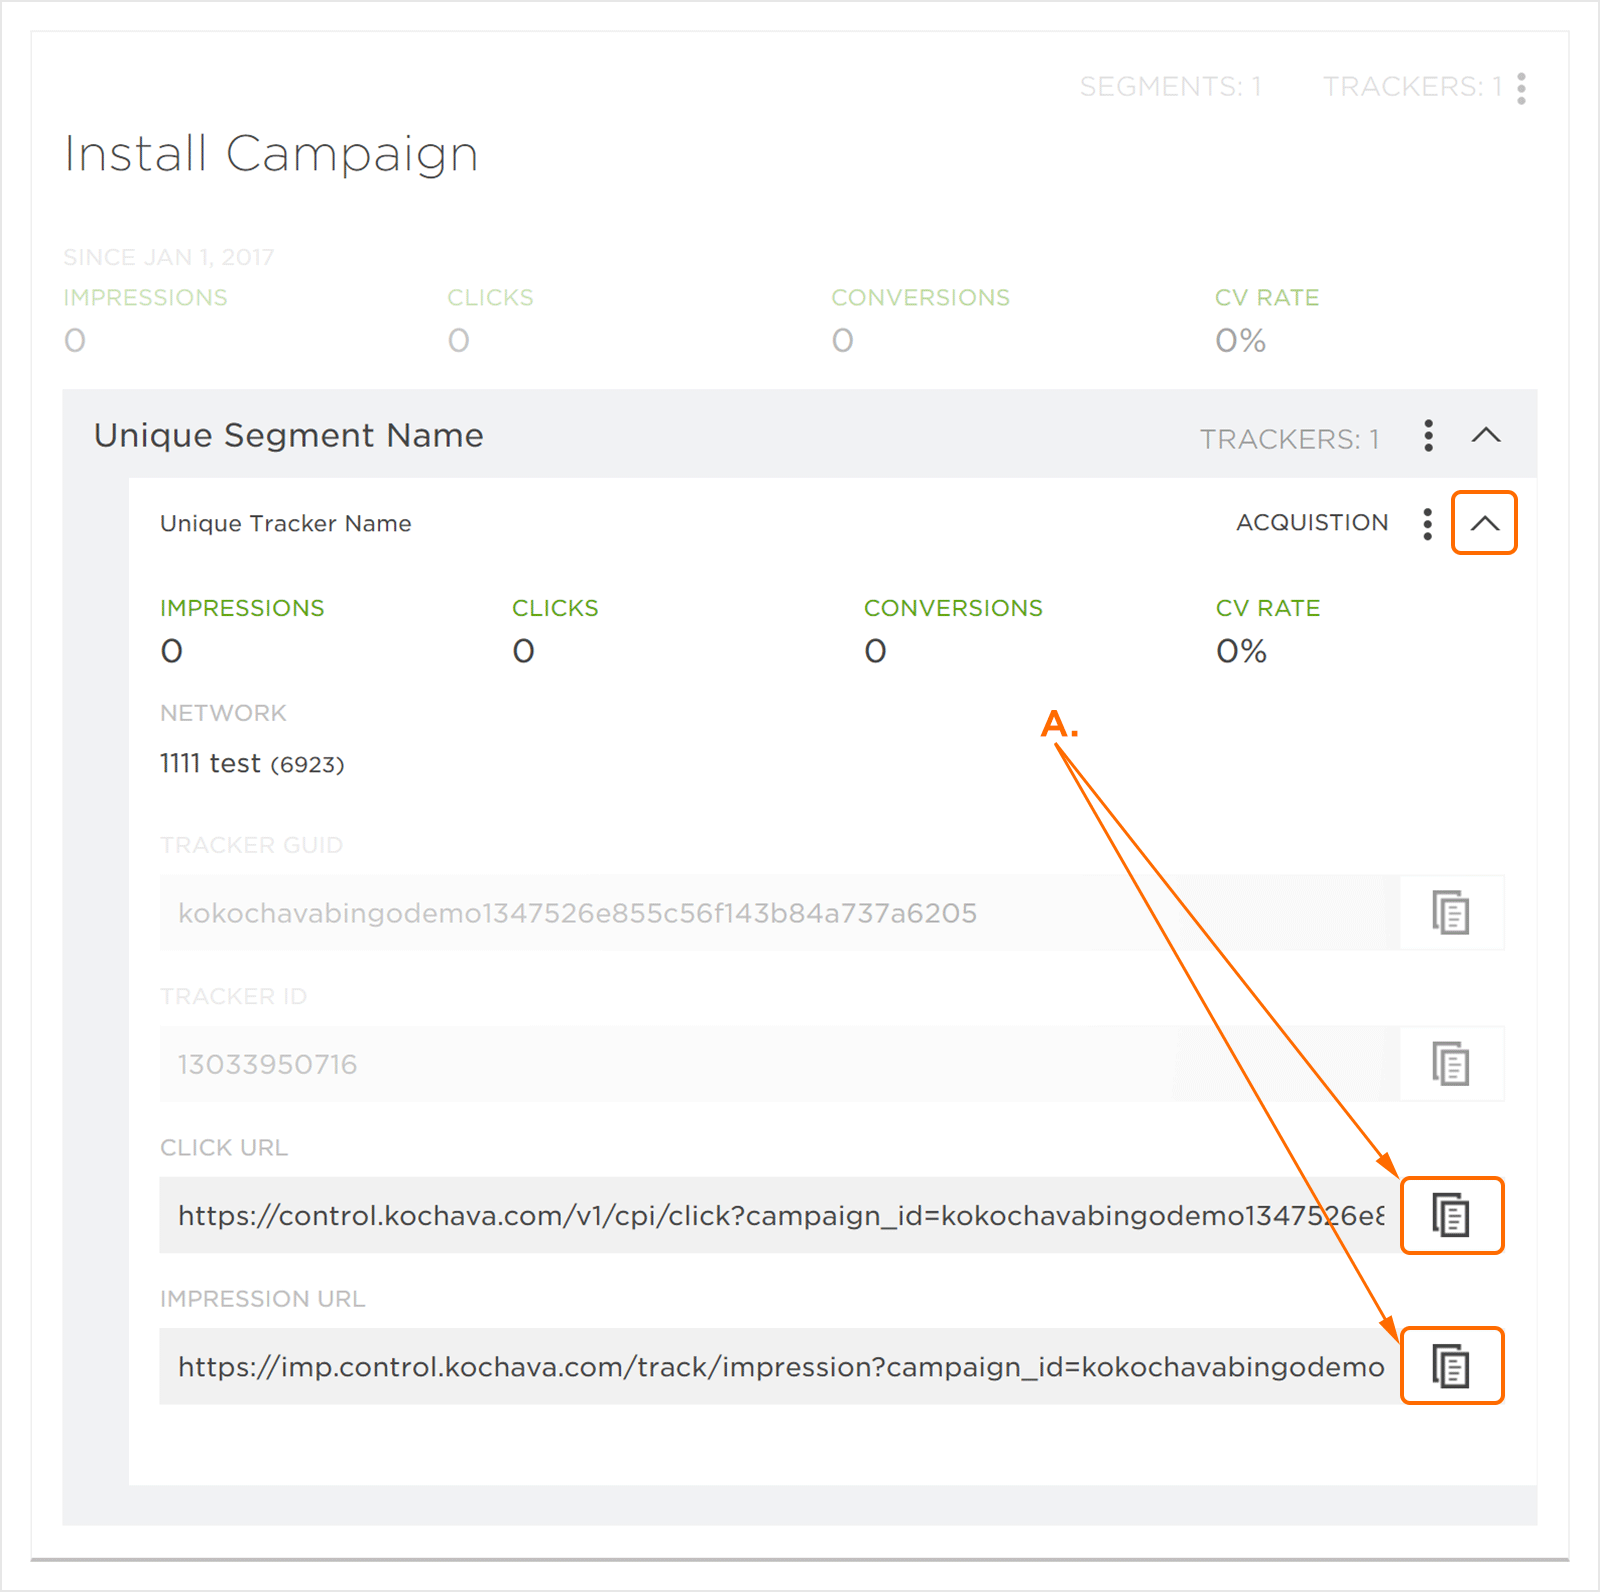
- Copy-paste it into "Tracking Link" input field while creating campaign at https://app.cpidroid.com/campaign/add after choosing Kochava as your "Tracking Provider".
Need Extended Help with Kochava?Please note that Kochava is 3rd party and for extended support, you may refer their:
- Help Center : https://support.kochava.com/
- Contact Kochava support via support@kochava.com to hear officially from Kochava team.
Updated on: 19/09/2026
Thank you!